Weekly Project: M54 Valve Cover Gasket Replacement DIY Instructions
I’m not going to bore you with the same tropes we’ve all become accustomed to in the last two months. Yes, we’re stuck at home. Yes, we’re bored. What can we do about it? We can offer you the instructions you need to help tackle DIY maintenance services! This week, in honor of my valve cover gasket leaking, I’ve decided to share our full instructions for the M54 valve cover replacement DIY. While it is specific to the M54, it is roughly applicable to a wide range of 24-valve BMW straight-six engines, especially in the M5X/S5X family. So it may be slightly different than what you have, but the principles should be the same for a number of your BMWs. If you’re looking for a fairly easy DIY and an evening of time-killing that yields a positive result, this is it! So, without further delay, let’s dig into the M54 Valve Cover Gasket Replacement instructions and tackle a pesky leak together. |
|
Step 1:
Park your car where you can shine some light on the engine bay and see what you’re doing. This is the easiest step there is in a fairly easy DIY. |
|
We are using an E46 to demonstrate the valve cover gasket replacement. Some details may differ slightly depending on model year and options.
|
|
Step 2:
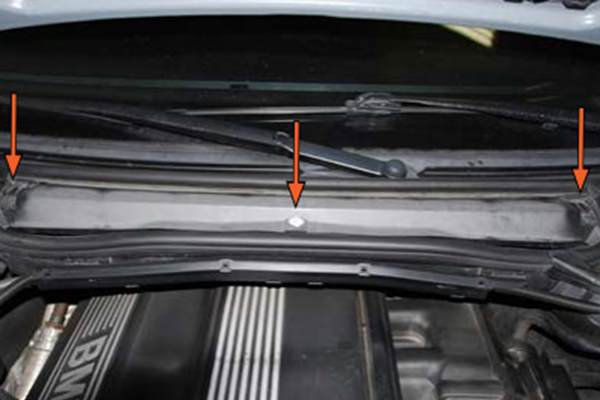
Locate the three spring clips on top of the microfilter housing cover. |
|
Step 3:
Turn each spring clip 1/4 turn counter-clockwise, and they will release and pop up as shown in the picture. |
|
Step 4:
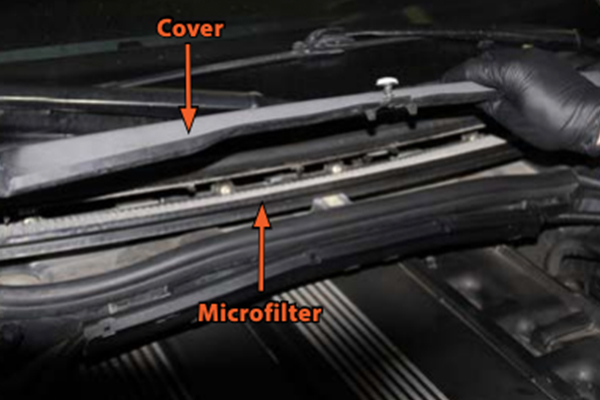
Lift the microfilter housing cover to remove it, then lift out the microfilter. |
|
Step 5:
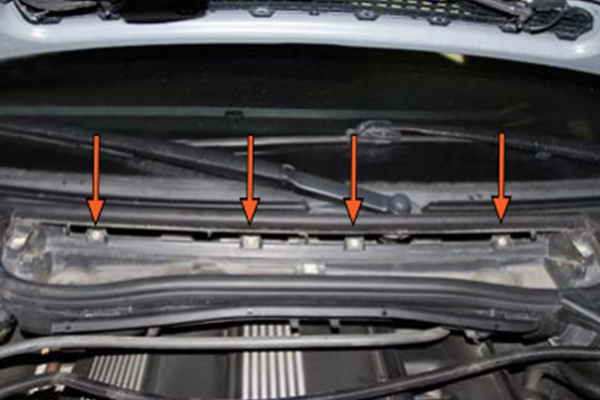
Locate the four tabs on the top of the wiring harness channel cover. |
|
Step 6:
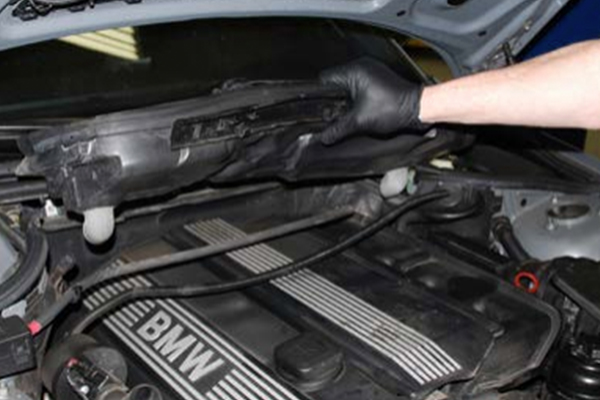
Using your thumb or finger, gently pull on each tab to release it. Pivot the harness channel cover downward, unhook it from the bottom and remove it. |
|
Step 7:
Pull the wiring harness and battery cable out of the harness channel. |
|
Step 8:
Remove the four securing T30 Torx bolts for the microfilter housing. |
|
Step 9:
Lift the microfilter housing off of the cowl. |
|
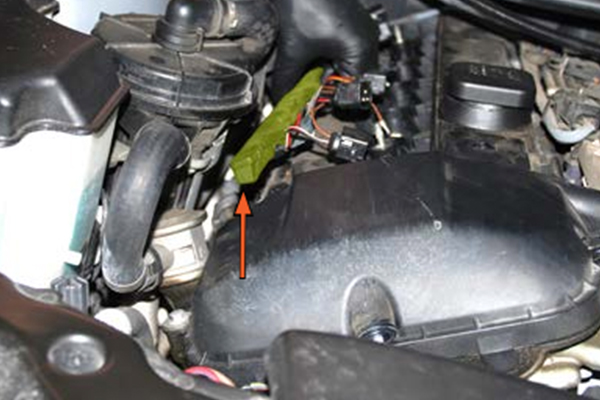
Step 10:
Remove the two access caps on the upper intake trim and two on the valve cover trim by gently prying them out. |
|
Step 11:
With a 10mm socket on an extension, remove the two bolts securing the upper intake trim and remove it. |
|
Step 12:
Remove the two 10mm bolts securing the valve cover trim, remove the oil cap, then lift the valve cover trim off and set it aside. |
|
There are four rubber insulators (one at each corner) of the valve cover trim. These tend to fall off. Be sure to account for each one and reinstall them on the valve cover trim as necessary. |
|
Step 13:
Detach the crank vent tube by squeezing the retainer tabs together and pulling it off the valve cover. |
|
Step 14:
Pull up the connector lock on the #1 ignition coil so that it pivots upward 90 degrees. The electrical connector will be released, and when pulled gently, it will now slide out easily. Continue in the same manner with the remaining ignition coils. |
|
Step 15:
Remove each ignition coil (these are not fastened and pull straight out). |
|
The connector lock on each coil doubles as a pull tab to remove the coils. |
|
Step 16:
Disconnect the two 8mm ground wires for the ignition coil wiring harness. |
|
- *Failure to re-connect the ground wires during installation will cause damage to the ignition system.**
|
|
Step 17:
The oxygen sensor harnesses are held in place along the rear edge and lower rear corner of the valve cover. Pull them up out of the retaining clips. |
|
Step 18:
Detach the ignition coil wiring harness from the hook-type clips on the valve cover by grasping the harness cover and pulling up at each attachment point. Move the harness to the side. |
|
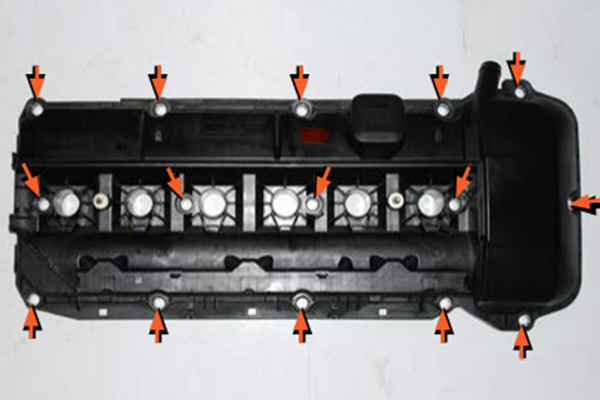
Step 19:
Remove the 11 nuts around the perimeter of the valve cover, and four nuts w/integrated studs from the center of the cover. |
|
Note: The valve cover is shown removed from the vehicle for clarity. |
|
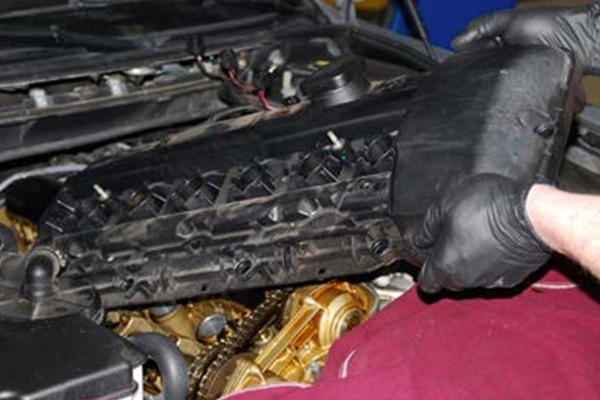
Step 20:
Lift the valve cover up and off of the cylinder head. |
|
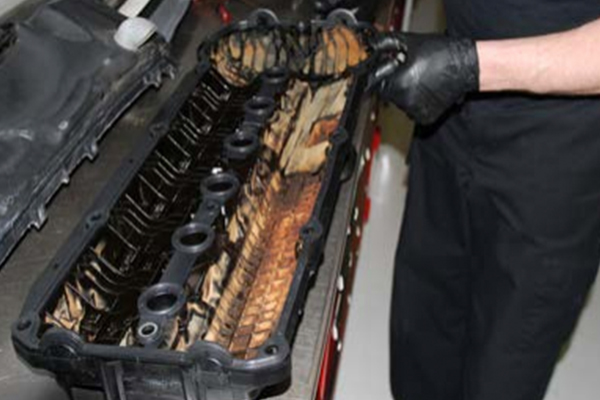
Step 21:
Remove the old gaskets from the valve cover. |
|
Pro tip: The gaskets are pressed into grooves in the valve cover, and they’ve usually become hardened and sometimes adhered to the mounting surface. Use a small screwdriver or pick tool to pry the gasket out, making sure to remove all of the material from the grooves. |
|
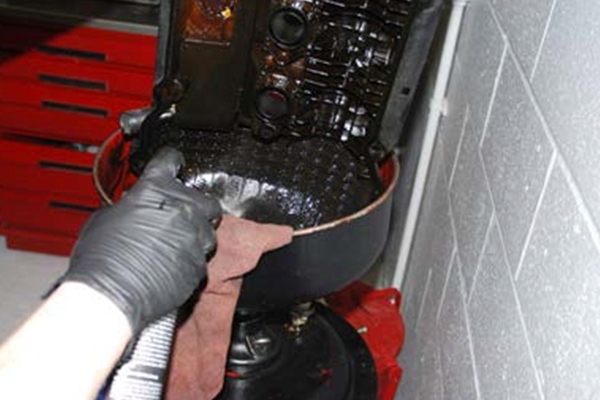
Step 22:
Thoroughly clean the valve cover, inside and out, with a suitable solvent. |
|
Step 23:
Press the new gaskets into the corresponding grooves on the valve cover. |
|
Step 24:
Check the alignment of the coil seals. This kit contains gaskets with tabs that align facing each other toward the center of the valve cover. Some gaskets may not have these tabs on them, but always make sure the coil seals are properly lined up and seated. |
|
Step 25:
Pry off the old, then install the new sealing washers onto the valve cover mounting nuts. |
|
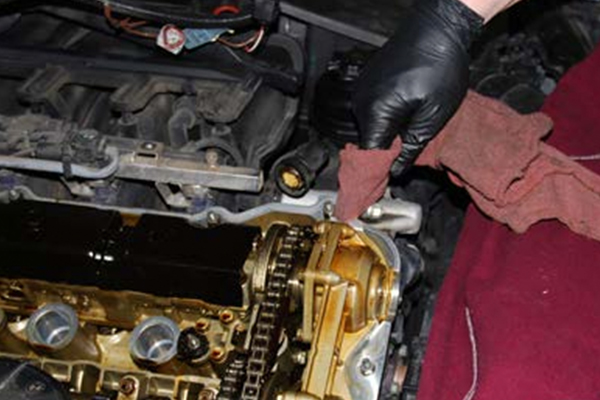
Step 26:
Thoroughly clean the gasket mating surface on the cylinder head with a clean, lint-free rag. |
|
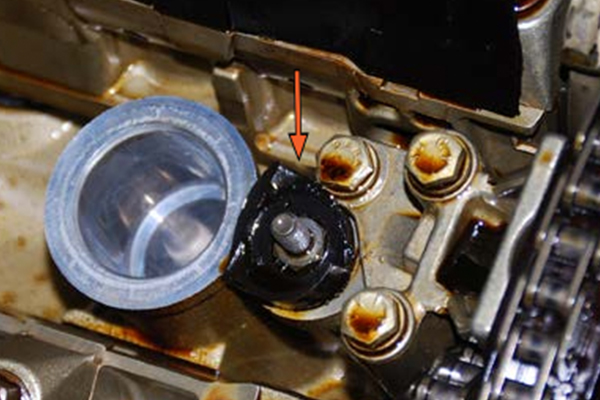
Step 27:
Make sure that all remnants of the former gasket are removed from the mating surface area. For example, this photo shows part of the center gasket that remained after the valve cover was removed. |
|
Step 28:
On both ends of the valve cover, apply a small amount of silicone sealant to the gasket at the corners of each half-moon cut-out section, as indicated by the arrows. |
|
Reinstallation:
Installation of the valve cover is the reverse of removal, but for convenience and accuracy, we have provided this checklist. |
|
Install the valve cover and fasteners. |
|
Torque the fasteners to 10Nm (89 in-lbs.) |
|
Attach the ignition coil wiring harness and oxygen sensor wires to the valve cover. |
|
Attach the ground wires for the ignition coil wiring harness to the valve cover. |
|
Install the ignition coils. |
|
Plug the electrical connectors into the ignition coils and push down the locking mechanisms. |
|
Attach the crank vent hose. |
|
Install the valve cover trim and oil cap, then install the intake trim. |
|
Install the microfilter housing. |
|
Attach the battery cable and wiring harness to the harness channel. |
|
Install the wiring harness channel cover. |
|
Attach the cover for the microfilter housing and engage the spring clips. |
|
If you’ve followed along with us, then you’ve successfully learned how to replace your valve cover gasket at home. There are tons of DIYs we’ve covered in the past to help you bring your BMW back to perfect condition, but for everything we’ve provided you, there are hundreds of DIYs we haven’t What projects would you like our help finishing? As always, reach out to [email protected] and let us know where you are stuck. Maybe you’ll see your set of helpful instructions in another edition of Turner Motorsport Weekly. |
|
| | |